I have Recently Updated my portfolio showing a lot of the designs I created during my 4 years at university, ranging from characters designs - Level/Game designs.
https://ashydesign.carbonmade.com/
My portfolio will show images for my work over time, however I will be using my Blog to post updates and videos about my design career as it grows!
Thursday 5 November 2015
Wednesday 21 October 2015
Level Designs and Development Diaries
Here are some walkthroughs, trailers and design development diaries, for the levels have have created over my time in games design.
N.O.V.A 2 Walkthrough -
https://www.youtube.com/watch?v=8yHzWGm0zR8
N.O.V.A 1 Trailer -
https://www.youtube.com/watch?v=4PQQ0x0OPuc
N.O.V.A 1 Dev Diary 1 -
https://www.youtube.com/watch?v=uwTgLVGd1r8
N.O.V.A 1 Dev Diary 2 -
https://www.youtube.com/watch?v=EydNS7KExU4
N.O.V.A 1 Dev Diary 3 -
https://www.youtube.com/watch?v=SJL6W6iUcak
Crimson Dawn Trailer -
https://www.youtube.com/watch?v=M4u9kq3N8PE
Crimson Dawn Walthrough (With Commentary) -
https://www.youtube.com/watch?v=M4u9kq3N8PE
Board Game Development Diaries
Dev Diary 1 -
https://www.youtube.com/watch?v=xRpb4J11_p4
Dev Diary 2 -
https://www.youtube.com/watch?v=ZyHUw7nqsJg
Dev Diary 3 -
https://www.youtube.com/watch?v=evCD_Z3OcNA
Presentation for Dare to be Digital competition
https://www.youtube.com/watch?v=JQX4mcHcYxc
Wednesday 15 October 2014
The Final Level.
So,
finally I have finished the level I set out to create at the start of my MA, everything
is finished and in that is needed to teach the player how to play themselves!
Below is
a walkthrough of the level, explaining the theories behind each area.

First of
all, as explained in a previous blog posts as most of you know when the player
is lowered into the first main area they are presented with three things a doorway
with lights above to the left, a computer in the middle and a map to the right.
Straight away there are three indications:
1. The
first is to use the computer, this is shown in the centre of the room with a
cone of light beaming down on it to suggest this is the first objective. Once
they use it they are presented with a keypad, suggesting a code needs to be
entered. The code needed is in the centre of the map to the right, not only is
this the correct code, but it is also showing where the player currently is on
the map. | |
| The Map |
2. The
map itself is also helpful, as it will help guide the player around the level
should they want to learn their way around. But it will also be the first
indication that some things are only visible in the dark when the lights are
off, as it will disappear once the code is entered and the lights are turned
on.
3. The
door to the right with the lights above it suggests that this is the main objective
of the level, that all the lights will need to be turned on and the door
needing to be opened.
 |
| The green lights, indicating Puzzle completion |
Once the
code is entered the lights will turn on and the player is then able to explore
the level, this will also come into play later on as this has now taught the
player that this code will turn the lights back on.
| Chevrons |
Throughout
the level there are a few forms of guidance to help the player around it. First
of all is the coloured chevrons on the wall, these will guide the player to
each puzzle room. The bottom of the chevron will always be pointing the right
way - For example if it is like this '\' it means that room is to the right.
The colours of the chevrons also play a part as they correspond to the colours
of the symbols on the keypad, as when a symbol is pressed a coloured keypad
appears, showing that rooms colour.
As well
as the chevrons there are a few landmarks to help navigate, there are some
scribbles on the walls saying things like 'Help' and 'Do not stop it' some a
small hints and some aren’t; they also suggests a slight narrative to the
level. Crates are also dotted around the level to help as landmarks but also
suggest to possibly go a certain way.
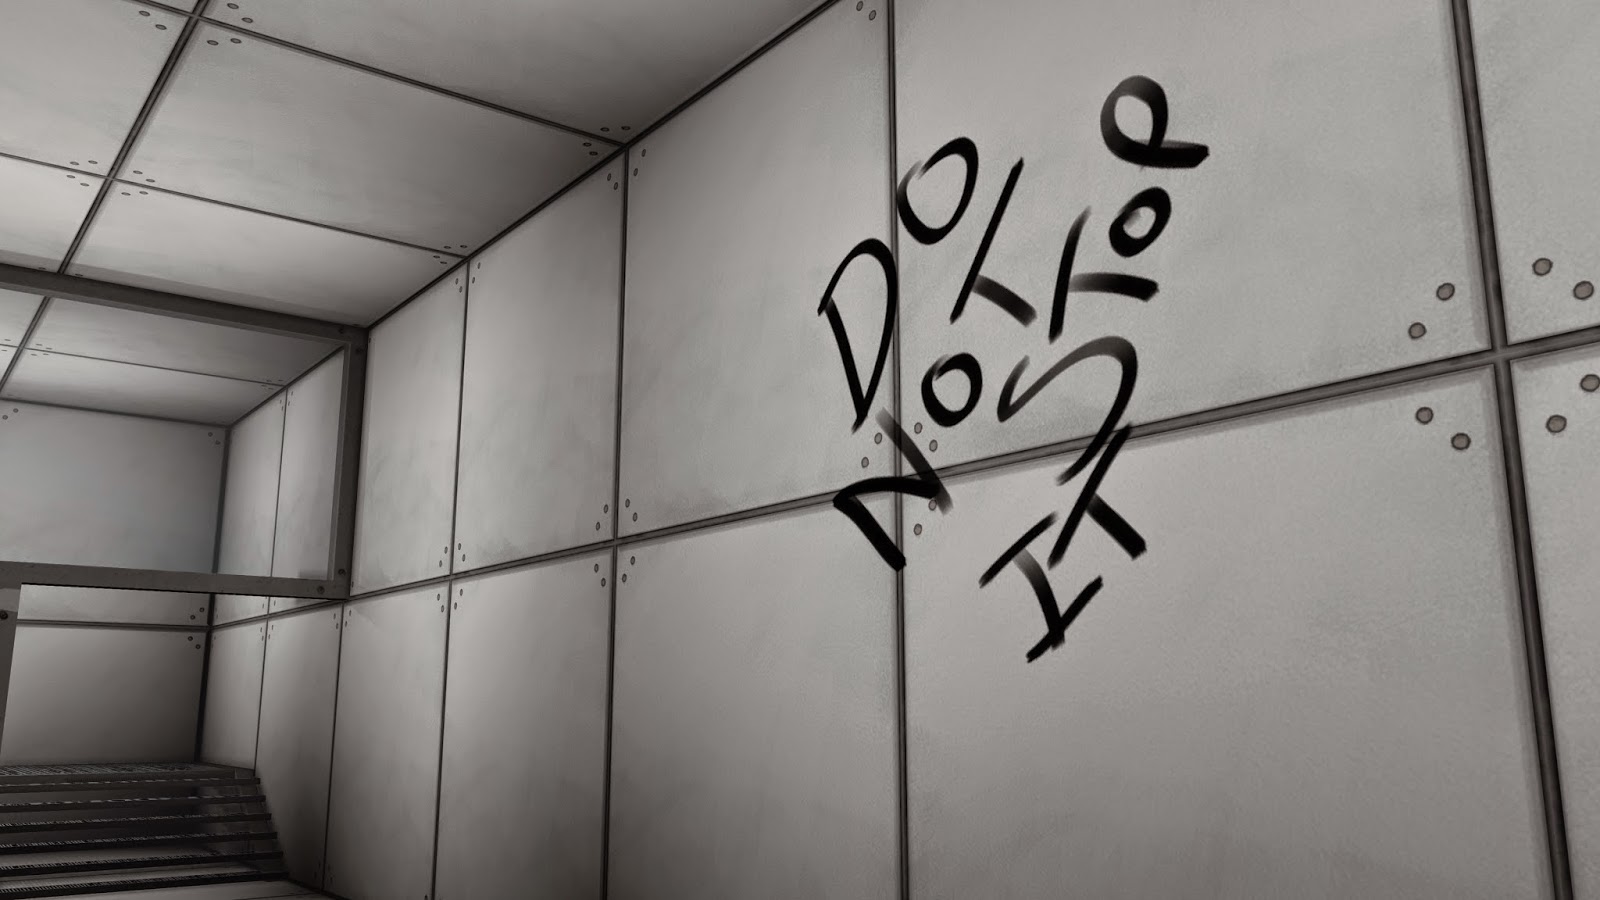 |
| Wall scribbles |
There is
also a way of guidance while the lights are off as well, and this is to do with
the alarm lights. While the alarm is sounding, red lights will fill the
hallways to show danger...however these will also guide the player back through
the level to the central main room where they can input the code again and stop
the alarm. Throughout the darkness there are also other scribbling in the UV
ink that the codes and map are drawn in, as extra suggestion that the player
must explore the darkness too.
Throughout
the level there are codes and rooms hidden around that the player must find and
access to help turn on the green lights back in the main area. All codes can be
found at any time, below is just an indication of the usual order or the ideal order.
The First
Code
 |
| The updated area for the first code. |
 | |
| Plant Pod Symbol |
The first
code players will usually come across is the 'Botanical Garden' code which is
'2830'. This is because this is the only code that is visible while the lights
are on as it is at the end of a darkened hallway showing it’s still only
visible in the dark. This will allow them to access the 'Botanical Gardens' and
attempt the puzzle. When they enter the room a plant will block the doorway,
they will then be stuck until they figure out the puzzle, should they take too
long the timer for the alarm will surely run out, they will die and be returned
to the main room. The Puzzle here requires them to pick up three vials and
place them in the correct order in the various plant pods around the room. Here
there are three indications to the correct pod placement:
 |
| Botanical Vial |
1. The
first indication is the plant that blocks the door. The plant that blocks the
player in is also a plant in three of the pods on the inside of the room,
indicating the correct place to put them.
2. The correct pods will have symbols on them, each of them correspond the symbol on the Vial that needs to be inserted into the pod.
3. Should the player read a 'Hologram' that is on the pod, the correct pods will say a different colour, which is also an indication to the colour of the vials.
2. The correct pods will have symbols on them, each of them correspond the symbol on the Vial that needs to be inserted into the pod.
3. Should the player read a 'Hologram' that is on the pod, the correct pods will say a different colour, which is also an indication to the colour of the vials.
 |
| Pod Hologram |
Once the
vials are in the correct places, the player can turn the valve at the end of
the room, the plants will die and they are free to explore once again. A button
will also appear outside the room, should the player press it the green light
for this room’s symbol will turn on in the main area.
The
Second Code
 |
| Etched 'Jump' on the main desk |
Once the
'Botanical garden' is complete there are now four more puzzles left. There is
one area that is always open, and is also shown on the map and this is the
'Jump Room'. Here the player will find the code for the 'Zero-G Room'. This
objective of this room is very simple as it is one of the first rooms the
player can come across and that is to jump over the wall to the other side.
This is shown in a few different ways:
 |
| Inside the Jump Room |
1. First of all before the player even ventures near the room, should they have
looked on the
desk at in the main area '-Jump' will be etched next to its
symbol near the computer.
2. Before
they enter the room, the hallway will be filled with crates in a way that makes
them seem as though they can be jumped over. This not only suggests the
objective for the next room, but also sets 'Jump' as a mechanic for the
level.
3. Once
they enter the room, it is tall with platforms protruding from the walls
suggesting they can be jumped to make it to the top.
 |
| Visible symbol and Line hint. |
4. There
is a window to the right of the room, and looking through it will show the
'Zero-G' symbol, further showing the objective.
5. As the
player is moving through the room, if they step close to the first wall a
platform will push out of the wall, if they move away it will go back in. Jumping
on it will keep it out, showing that other platforms will also protrude out of
the walls.
6. finally,
on the wall of the room are some lines in a certain order, this suggests the
jump pattern of the room.
 |
| Zero-G Code - The reward for completion |
Once
completed they will be given the code needed for the 'Zero-G Room' which is
'1623' and a button will appear outside this room, pressing it will activate
the green light for this symbol in the main room.
The
Zero-G Room
 | |
| The Zero-G Room |
 |
| The Orb Pedestal, with symbol indication. |
 |
| What the orb looks like before it is powered. |
 |
| And after it's powered. |
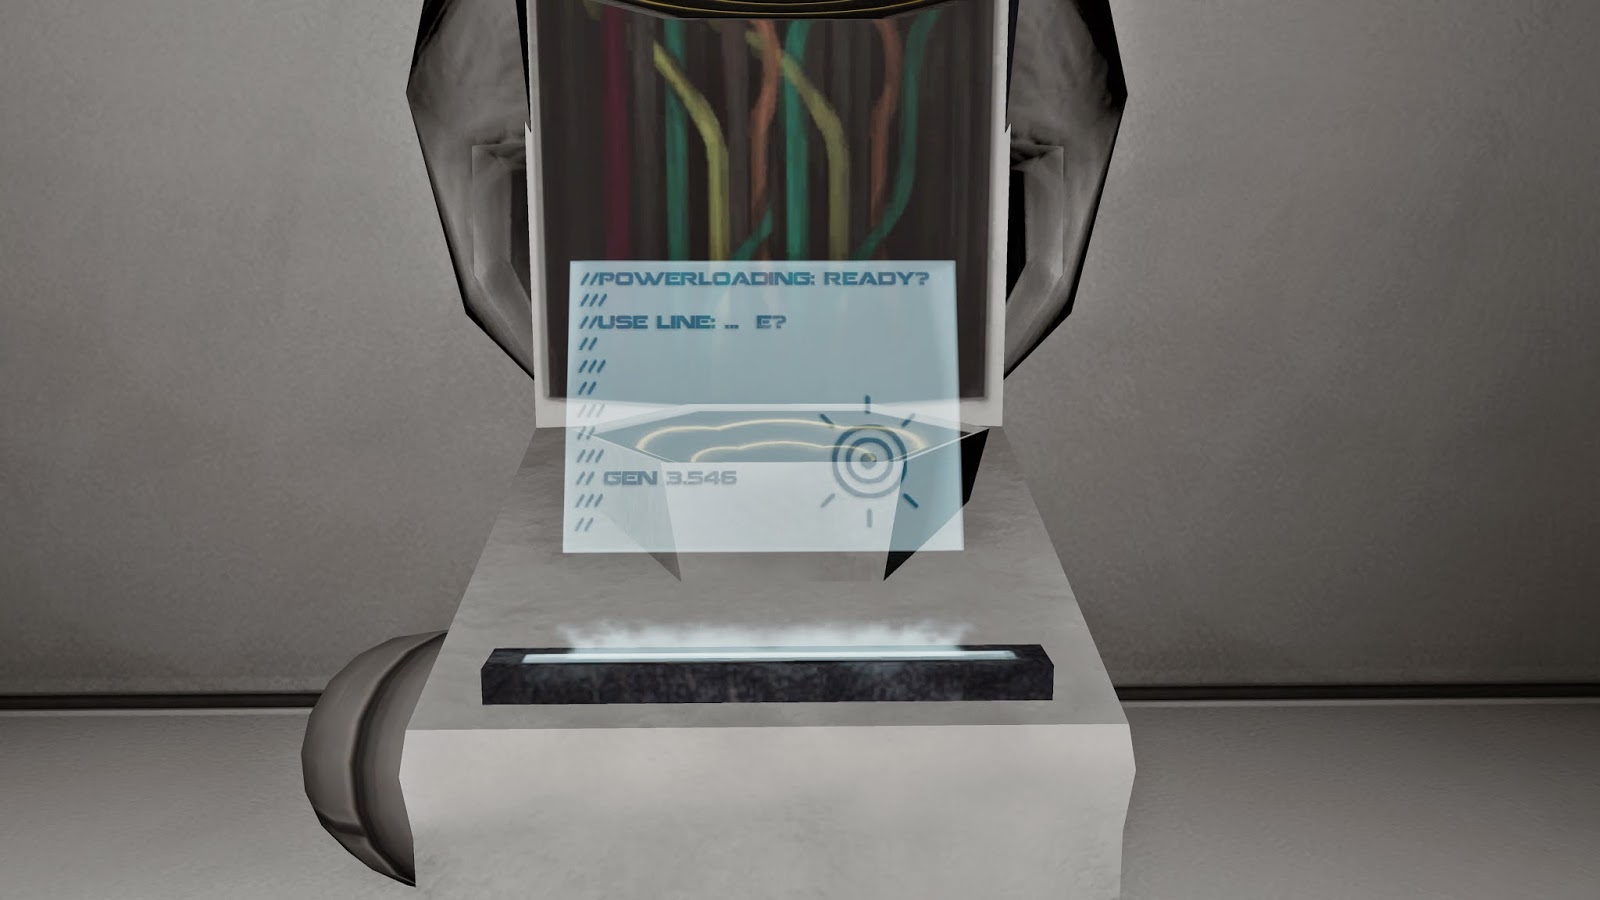
When the
player ventures to this room they will be presented with floating debris,
should they enter the room themselves they will also find they are floating
too! However the controls in this room will only allow them to move side to
side and also jump if they’re touching ground. Using these controls and the
slanted walls if they go to the top of the room they will notice a pedestal,
which looks as though something can be placed on it. If they drop down to the
right side of the room they will find a crystal, which doesn't look like any of
the other objects in this room and can also be picked up. This ISN'T what needs
to be placed on the pedestal...not yet anyway... If the player had studied the
map, or explored the level prior to this, they will have noticed another room
with the same symbol as the 'Zero-G Room' this will be where the crystal has to
be taken. Taking the crystal here, they will be presented with a power loading
room, placing the crystal on in the generator will 'charge' it up and change
its colour, indicating it can then be picked up again. Taking the crystal back
to the pedestal will now allow it to be placed and the button appear outside
the room’s door, pressing it will activate this room’s green light.
 |
| Dark Room Code. |
Side
Note: Should the player make it to the generator as the lights go off, they
will notice the code for the 'Dark Room' which is '1790'
The Dark
Room
 |
| Button and light path for the dark room. |
Outside
this room is a button and pressing it will turn the lights off inside the room,
which will then reveal lines on the floor in UV ink. (This is also another
slight suggestion that writing will appear in the dark, just in case the player
wasn't clear on that by now) Walking along the lines is a safe path through the
room and will lead to another button in the centre of the room. The first
button will also show the last small section of path to the final button of the
room also, the button in the centre is more of a waypoint/safe-zone. Reaching
the button in the centre will then reveal the middle part of the path for the
player to walk along safely. Should the player stray from it, they will die and
be rest back to the main room and all the green lights will be reset. The
Puzzle for this room is relatively simple, but it is very unforgiving due to
the player dying if they make one mistake. Completing it however will present
them with a button outside the room which will activate this room’s green
light!
So, after
this puzzling journey there is now one more light to turn on and still one more
code to find (if the player hasn’t already come across it anyway) Using the
knowledge that things will appear in the darkness, that must meant the final
code is somewhere when exploring in the dark right?...RIGHT! Should the player
walk up these stairs in the darkness:
 |
| Stairs leading to the Water tank Code. |
They will
then walk down a hallway, and find the final code for the 'Water Tank' which is
'4295'.
 |
| Water Tank Code. |
The Water
Tank
 |
| Bubbles coming rom the valve after the first turn. |
This is
the most abstract puzzle in the level and I will explain why. There are only
two indications on how to complete this puzzle:
1. On the
map in the main room, there is a '1' where this room is located.
2.
Bubbles.
Should
the player jump into the tank of water, they will then be presented will a
multitude of valves and will also be locked in until they complete the
puzzle...or drown. The aim is simple, drain the water. If the player was to
turn a valve, bubbles will appear on that one and all other around the tank, as
well as from the bottom of the tank, the water will also start to drain. 'Oh
maybe I have to turn more valves to make the water drain faster!' said Jimmy.
Jimmy now turns another valve, the bubbles turn off and the water begins to
rise! Jimmy then starts frantically turning more and more valves but no more
bubbles appear. Things then begin to fade...Poor Jimmy.
Basically
the solution to this puzzle is also simple, Turn 1 valve and wait for the water
to drain. The idea behind this puzzle is to get the player to wait once in a
while, instead of trying to rush things! Then they shall be rewarded with a
drained tank that they can now climb out of! The button for this room will
appear at its door, pressing it will turn the green light on!
Now most
likely the player would have died and been reset back to the start a few times
by now, however that’s what the buttons outside the puzzles are for. If they haven’t
done this in one life, they must now find the correct route around the level to
press the buttons and turn on the lights in the centre. This will then allow
them to press the button next to the main door and here the beautiful 'Access
Granted'. Behind the door is a lift and taking the left up will then reveal a
short video saying 'Welcome to N.O.V.A' this is a small homage to the level I
made in my third year of unit, as this level served as a prequel to it! So that
is the player’s final reward! Interestingly enough the green lights seem to be
reward enough for the player as when the complete a puzzle, run back to the
room and see the light on, they get a great sense of achievement as they feel
as though they're actually progressing.
 |
| The Final Video. |
After a
year of working on my MA this level is the culmination of everything I
originally set out to create, teaching the player to play without tutorials,
giving them a sense of free roam and having harsh but rewarding gameplay.
Although
there have been hurdles throughout with the original ideas not coming to
realisation straight away, issues with new software and also my laptop dying!
I'm happy with what I have achieved.
If you would like to watch a video of a full playthough then here you go:
Or head to the link here: https://www.youtube.com/watch?v=8yHzWGm0zR8
To
whomever this may concern, thank you for following my blog for this long and
taking an interest in my work! I means a lot as I have noticed a few views on
each of my posts, a few comments as well etc. I may update this blog as I
progress in my game design dreams, or I may just make a new blog for it all, I’ll
find a way to let you know xD
BUT
THANKS ALL THE SAME!
LATERS
TATERS! =D
Monday 13 October 2014
Testing the Idea...PART 3! - Return of the Test
Sooo, as
you know I've been testing my level all week so I know what things to change to
get players to understand the rules of my game better. Up to now the tests have
been relatively successful with a few things that failed here and there, but
nothing that can’t be fixed or updated! (There
have still been a few problems with the Kismet scripting, but they should be all
sorted now...I hope!)
Anyway,
moving onto the new tests that have worked and what has been changed!
Currently
this week we have had two people complete the level, with a further 2 that
would have been able to complete the level given the time. However, since the
completions I have made a few adjustments to the level to push certain
ideas...Though most of it remains the same as explained in the last update!
I also
created a little tally while I was in uni the other day, just tallying up how
many people have played to how many of them have understood what we set out to
achieve. Although not all of them have completed the level, the guidance
implemented and the designs implemented almost all of them have understood,
with the odd one that doesn't.
 |
| The main area in the dark and light. |
The
second person to complete the level this week was Bleu Dickson. It took him
about 2 hours to complete and he understood everything about the level. This
includes the guidance, alarm light guidance, codes in the dark, jumping in the
jump room (Now that the crates have been added to the hallway before the room)
the holograms in the botanical gardens, the 'E://...' on the computer (and also
prior experience), that the water tank puzzle had something to do with bubbles,
learnt his way around the level and finally that all the lights had to be
turned on in the main room to complete the game.
Bleu's is the best test yet, and after him we had two others, Luke and Sam who have also had brilliant tests, where everything was understood. Sam will even be continuing where he left off next week, as he had to leave to time constraints.
Luke
however didn’t manage to complete the level due to not exploring to the
generator room. This was a strange event as he has been the only person to not
walk down the hallway to this room, instead he looked down it and diverted away
every single time. he was also the only person to note the map down on paper
(note: Every tester is given a piece of paper they can write things on should
they feel the need to, but only a certain few seem to write things down)
We also
had some foreign exchange students in class this week, from Germany, so I
thought it would be a good idea to get at least one of them to test it (again
they had time constraints as it was about...6pm when the test began and they
had to pack their bags to fly home! also, for some reason the game decided it
was going to crash every 5 minutes which hadn't happened until this test...)
the one who tested it was called Ray, and as far as he got, seemed to
understand most things he saw. When he saw the generator room, he understood
something had to be brought to it, although at the time didn’t know due to him
not finding an object to pick up. The only thing that didn’t work exactly as
intended but still worked was the chevron guidance. He used them as a guide,
however only linked the green chevron to the plants...for obvious reasons.
 |
| The new updated crates, No longer using UDK's stock crates. |
Finally,
some things that didn’t seem to work as intended have now been changed. As
mentioned in my last blog update, the jump room now has crates before the
player enters the room; this has definitely had an effect as players learnt
that jumping is actually a mechanic that can be used in the level before they
get there.
 |
| Main Room lights Before. |
 |
| Main Lights and door now. |
Another
that didn’t work as intended (mainly because it wasn’t properly finished yet,
as we didn’t have an ending to the level until recently!) were the lights in
the main room. Most people who came across these thought that the codes would
make the lights change, indicating somewhere was open. However the lights are
there as an indication to when a puzzle is completed. It is understandable that
players thought otherwise though! BUT! Now we have changed it I expect there to
much more understanding as to what the lights do, which is open the door below
them once all the puzzles have been complete.
 |
| The Updated Generator Room |
The
generator room seemed important for most players, but again as mentioned in my
previous blog update we were making a change to the texturing of the generator
to show the symbol of the 'Zero-G' room, so there is a link between them both.
This again definitely made a change and players now understand that something
from elsewhere in the level needs to be placed there.
 |
| Updated Generator texture. |
 |
| The new 'Incorrect' texture for the Plant Pods. |
And
lastly, the botanical gardens plant pod holograms have also been changed! They
are now actually visible! The tester that made it there one the chance was made
was Sam, and he instantly went to read them, and noticed some where different
to others, which gave extra help to which vials when in which pod.
 |
| The new 'Correct' texture for the Plant Pods. |
As you can see the difference between the two is that the bottom pickure has '////Blue_2291.011....' which means its as simple as placing the blue vial in that Pod, whereas the others do nothing.
Below are the links to some of the tests we have currently conducted, Some are in two parts as theyre too lon gto upload as one!
Jack Part 1: https://www.youtube.com/watch?v=i7rqkx1kRss
Jack Part 2: https://www.youtube.com/watch?v=LuYRKHwVwBc&feature=youtu.be
Farron Part 1: https://www.youtube.com/watch?v=AbdoarcAn5Q
Farron Part 2: https://www.youtube.com/watch?v=vUlndnQzBzw
Josh Part 1: https://www.youtube.com/watch?v=_HWsDcUac-I
The rest will be uploaded in the My final Blog post!
The final
hand in for my MA is next Wednesday and I will be testing more on Monday and Tuesday
to make sure everything is working correctly for my hand in!
Thanks
for reading so far! =D
LATERS TATERS!
Subscribe to:
Posts (Atom)